Continuous deployment is one of the tools provided by DevOps where we as a developer want to control the deployment process of the APP we are developing. Therefore, in this example we start from the assumption that we already have an application (or at least it is under development) and we want this application to be deployed by ourselves and automatically.
When we talk about CD around DevOps it has two possible meanings:
- Continuous Delivery: the package is built and left ready to be deployed, but the deployment is done manually.
- Continuous Deployment: the deployment is also automated.
Before starting with the configuration, it is necessary that we place ourselves in the environment that we have in order to be able to make the deployment. In this case the environment we have is gitlbab + kubernetes. This environment consists of one around PRE and one around PRO . In this article we want to explain how to deploy automatically in the ERP environment.
The first thing to do is to request the registration of the service and, once the relevant procedures have been completed, we receive a series of configuration parameters to be added to the gitlab. So we will enter gitlab and the bar on the left go to SETTINGS -> CI/CD.
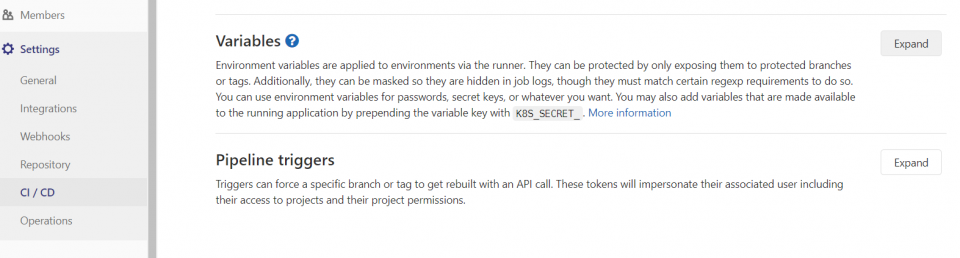
Now we “expand” the variables and “add value” and add the values that have been sent to us.
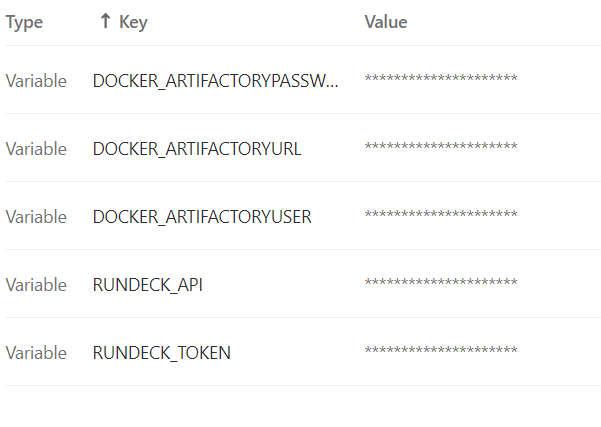
These values configure where our “artifactory” is located (place where we will leave the images of our app) and with which user and password we will access.
We also configure API and the RUNDECK TOKEN (console for task automation accessed via API).
At this point we have the environment ready to start with the CD. In the case of gitlab everything concerning CI/CD goes through the configuration file named .gitlab-*ci.yml
A first version of this file will be as follows:
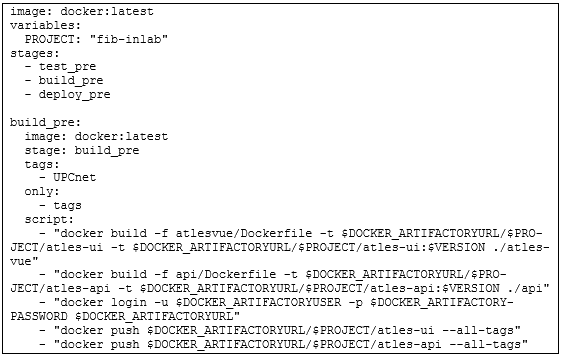
A first version of this file will be the Let’s note that we define 3 stages (pot, build_*pre and deploy_*pre):
In this article we will not refer to the potting stage, since it is about running everything that needs to be done to verify that our app works.
The build_*preel builds the docker images of our app (we must have a DOCKERFILE file in our repository where we explain how each of the images of the project must be built).
In the case of the example in question, our APP consisted of BD+ API+UI. The database as it was docker image by default we didn’t need to build it therefore the garbage is:
- We build the images that we need (API and UI).
- We authenticate against the arifactory.
- Let’s push the images we have created.
Before I go on let me give a brief explanation of how .gitlab-*ci.yml works.
We as developers often do: git push origin master to upload the code to the repository, if we have the .gitlab-*ci.yml file very configured to each push it will execute the pot stage, but it will not execute the other stages (for not making a CD each time we do a push).
When we decide that we want to make a new image of our app we will have to execute the following commands:
- git push origin master (check that we have not broken anything)
- git tag <num_version>
- git push –tags
This behavior that the build_*pre and deploy_*pre stages, which are only done when a tag is garbage, is configured with the following lines within the build_*pre and deploy_*pre stages:

If we were to end our article here the one we would have done is Contiuos Delvery, we have the images about to be deployed, but the deployment would be done manually.
But we want to go further, we want to deploy, so we add in our .gitlab-*ci.yml in the variable section we add all the following variables:
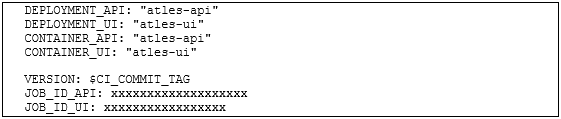
And below the build_*pre stage we add deploy_*pre stage:
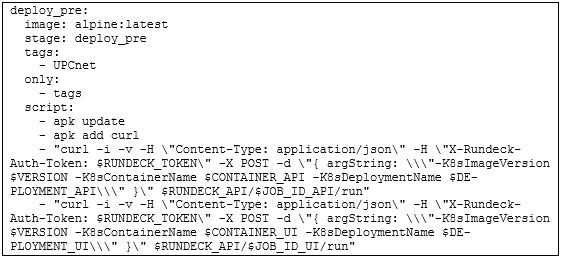
The garbage with these lines is to take the images from the artifactory and copy them to the RUNDECK by copying them through API, the TOKEN and the JOB_*ID that we have defined (some things are in the Settings of the gitlab and the job is in the variables of the .gitlab-*ci.yml file).
If everything has gone well, at this point we can access our APP (to the URL and port where we have defined it) and we will be able to see the logs of the APP through the kibana.